pliance support

Find answers to your questions on how to utilize pliance

pliance hardware:


How to connect the pliance via Bluetooth

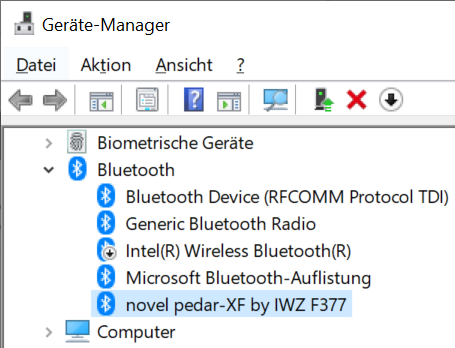
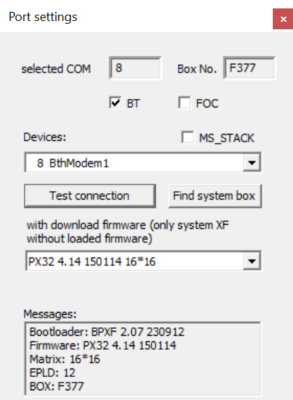
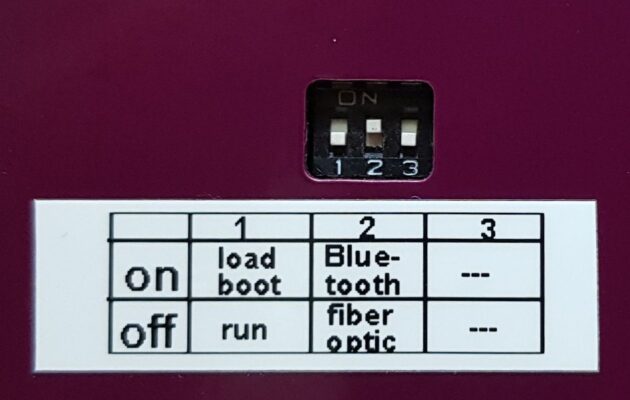
This is how to connect the pliance system to a Windows computer via BT:

 
  1. Connect the pliance unit to the battery and turn the system on.
  2. Disable internal Bluetooth via the Windows Device Manager.
  3. Connect the provided Sena dongle to the computer.
  4. Go to the Bluetooth device settings menu in Windows.
  5. Click Add Bluetooth or other device.
  6. Choose the Bluetooth device type.
  7. Wait as Windows scans for the device. It should be listed as novel pedar-XF by IWZ.
  8. Select this device. NOTE: it may be necessary to select the device multiple times as Windows tries to send an automatic pairing code. Typically on the 3rd time, the dialog will then ask for a passcode. 
  9. Enter the passcode pedarX (note the capitalization).
  10. Click Next and the device will be added.
  11. Click More Bluetooth Options and ensure only the Show the Bluetooth icon in the notification area option is selected.
  12. Click on COM Ports and note the outgoing COM port number. This will be used in the pliance software.

Sena Dongle

How often do the sensors need to be recalibrated? How will I know when the sensors need to be recalibrated?

 
  • The sensor calibrations should be checked at least every three months (depending on usage).
  • To check the calibration, place the sensor in the trublu calibration device, load the sensor through the load values up to 6 Bar.
  • Check that the values that are displayed in the software with the values that appear on the manometer.
  • If the values match within 5%, the calibration is okay. If the values differ by more than 5%, recalibration of the sensors should be done.

With the pliance-x, Bluetooth has problems establishing a connection.

A Bluetooth connection may fail for several purposes.

 
  • A Bluetooth connection may fail for several purposes.
      • If the wrong COM port is entered into the Data Acquisition > Test connection window, the connection will not be established.
      • Check the outgoing port listed by right clicking the Bluetooth icon in the Windows system tray.
      • Select the COM port tab.
      • Make note of the outgoing COM port listed for pliance-x.
      • Enter this COM port in the Data Acquisition > Test connection window from the pliance online measurement window.

  • Windows occasionally drops the Outgoing connection (the connection used by the novel pliance software):
    • Right click the Bluetooth icon in the Windows system tray and select Show Bluetooth Connections.
    • Select the pliance connection and click the Remove
    • (After the pliance connection has been removed) select the Add button to re-establish connection (for details review the pliance-x manual on establishing Bluetooth connections).
  • The Bluetooth connection may fail because the middle dip switch on the back of the pliance-x analyzer is in the fiber optic cable measurement position (down position):
    • With the analyzer turned off, set the dipswitch in the up (Bluetooth) position.

    • Switch the analyzer on, wait approximately 30 seconds, test connection in the pliance online measurement software with the Outgoing COM port number listed in the Bluetooth software.

I am receiving dropped frames during collection. How can I improve the Bluetooth connection between my pliance-x analyzer and my Bluetooth dongle?

Ensure that there is a clear path (no visible obstructions between the Bluetooth dongle and the pliance analyzer antenna). A USB extension cable (up to 5 meters) can be used in conjunction with the Bluetooth dongle to allow the Bluetooth dongle to be placed on a tri-pod or other pole to position the Bluetooth dongle in an unobstructed view with the pliance analyzer.


Many or all sensors show time outs (TO) when I try a data collection or calibration.


Check if the pliance sensor plug is inserted into the cable connector completely and with the correct orientation.

The R on the sensor plug must line up on the same side as the R on the cable connector.

pliance software:


How do I increase the sampling rate above the preset maximum?

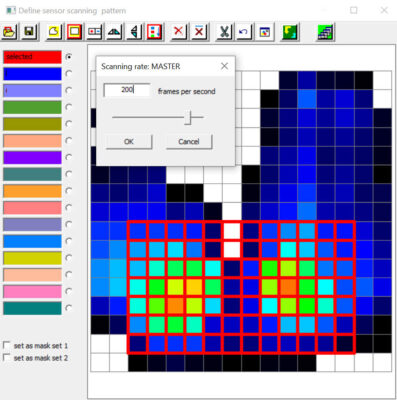
The maximum sampling rate for the pliance analyzer is 20,000 sensors per second. Usually a sensor is delivered with a configuration scanning all sensors of a mat with the highest possible scanning rate. If the number of sensors collected from is reduced, the sampling rate can be increased:

 
  1. To increase the maximum sampling rate, the number of sensors collected from must be reduced.
  2. To increase the maximum sampling rate, select the sensor configuration from the sensor configuration dropdown menu. Select Data Acquistion – Define sensors to be scanned.
  3. Delete all the masks present (6th icon from the right).
  4. Select one of the 16 masks to the left of the sensor graphic.
  5. Select the Rectangle drawing tool (4th button from the left): Left click and hold, then move mouse over the sensors that you would like to include. Multiple areas can be selected this way.
  6. Click the Download all masks button (1st button from the right).
  7. Save the new configuration (.mfg). After saving, a small window will appear that allows adjustment of the sampling rate. Select sampling rate and click Download. Unload each sensor when prompted and click the red record button. Check the pliance analyzer if during the measurement no red error LED is on. – If red LED was on, reduce the sampling rate. Use the function Data acquisition – Change/test scanning rate to find the optimal frequency.

The settings that I select from the menu on the pliance-x measurement screen (e.g. COM port settings, Automatic scale on graphs, Error code settings, MVP options, etc.) are not saved when I exit from and reopen the software

 
  • After selecting the desired measurement and display options before exiting the software select File.
  • Exit with storing changes. The settings will be saved, and you will not be required to select the changes the next time you open the program.

Could you explain choices for the Mean Value Picture (MVP) under the Options menu?

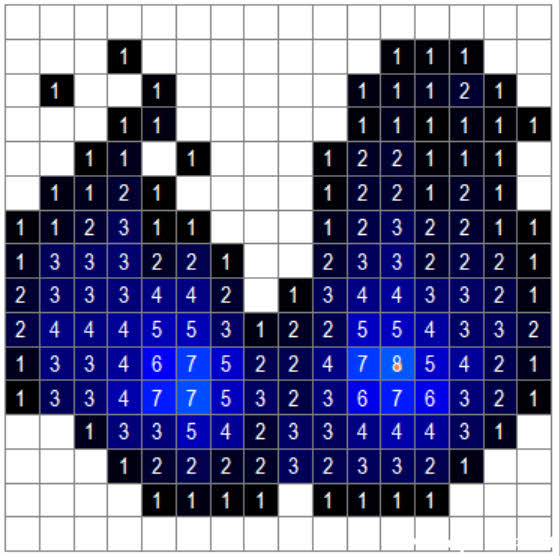
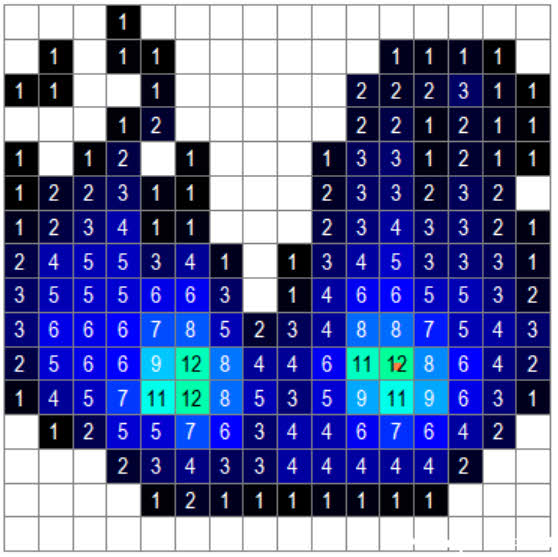
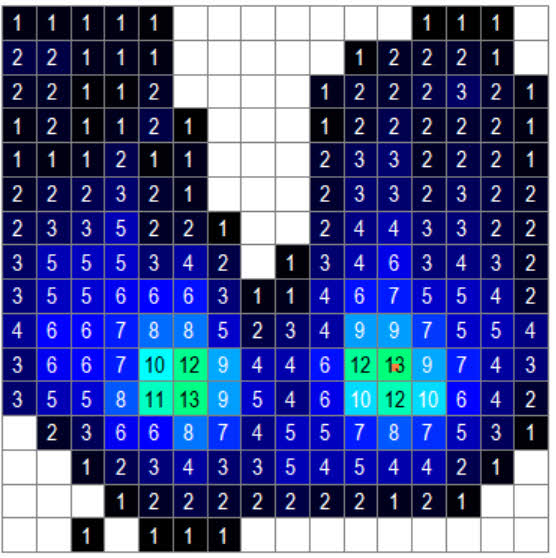
There are three options for the MVP calculation: over all frames, only over loaded frames, and only over loaded sensors:


  • Over all frames: The mean pressure is calculated using all frames of data, even the frames with no pressure on any of the sensors. This will result in the lowest mean pressure of all the MVP options.
  • Over loaded frames: The mean pressure is calculated from only frames that had at least one sensor that registered pressure. All frames in which the sensor was completely unloaded will not be used in the mean pressure calculation. If a sensor was unloaded during a frame that other sensors were loaded, the zero value for that unloaded sensor will be used in the mean calculation.


  • Over loaded sensors: The individual sensor mean pressure is calculated with only the frames and only the sensors that were loaded. No zero pressure values will be used in the mean value calculation.

I am concerned that the pliance-x analyzer will go out of range of the Bluetooth dongle attached to the PC. Can anything be done to ensure that I do not miss data during data collection?


    • Insert the SD card to the pliance analyzer, which is configured for the sensor size you are going to use.
    • Select to collect both to the SD card in the analyzer and to the PC memory:
      Data Acquisition --> Mode --> Online + SD card.
    • Select the correct sensor configuration from the drop down box on the pliance-x measurement screen.
    • After recording, select File – Open SD card, to access the recorded data. They will be listed with their recording time, and will be without missing frames.

I can’t open the program and got this error message, but the file is availabe in the folder:

This error is caused by a corrupted cfg file of the pliance software. The cause may be a messy termination of this software, perhaps due to a crash or something similar.

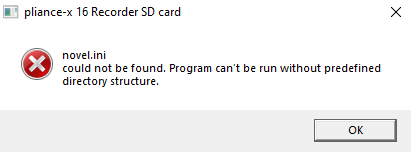
To solve the problem,

  • Please make a backup copy of the [C:/novel] directory.
  • Uninstall the pliance software only.
  • Then please check if there are any configuration files (*.cfg) left in the directory [C:/novel/novsyst/pliancex/mfg] for pliance-x 16 or [C:/novel/novsyst/pliancex32/mfg] for pliance-x 32 and delete them. You should not delete the remaining directories, as they contain your mat configurations.
  • You can now reinstall the pliance software in the latest version you have and the program should start again.