
loadsol and loadpad support
Find answers to your questions on how to utilize loadsol and loadpad.
Insert Battery:
Power On:

Charge the Device:
Power On and Check Indicators:
Download & Install:
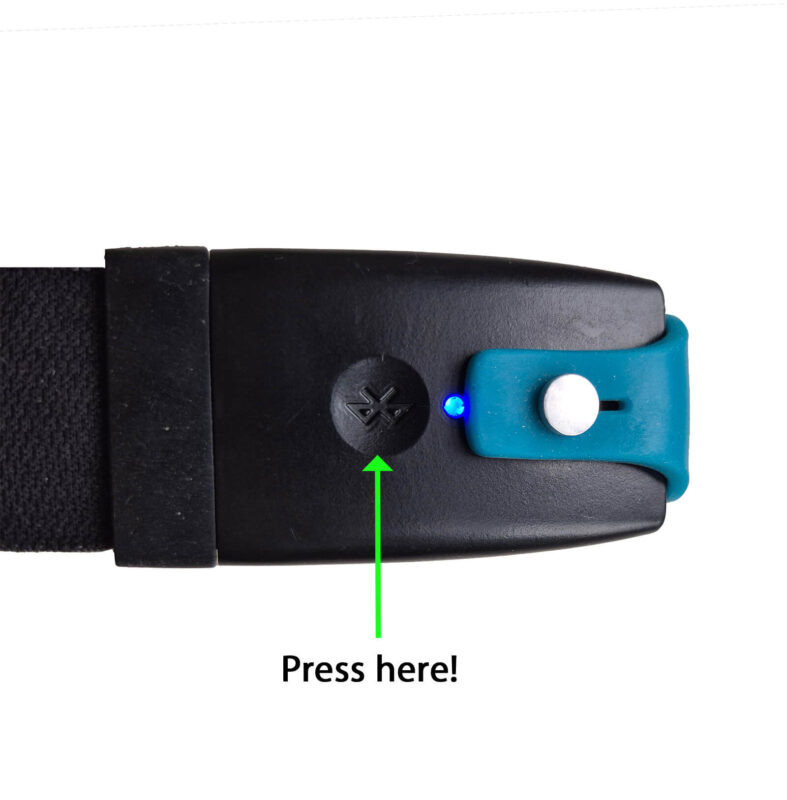
Enable Bluetooth:


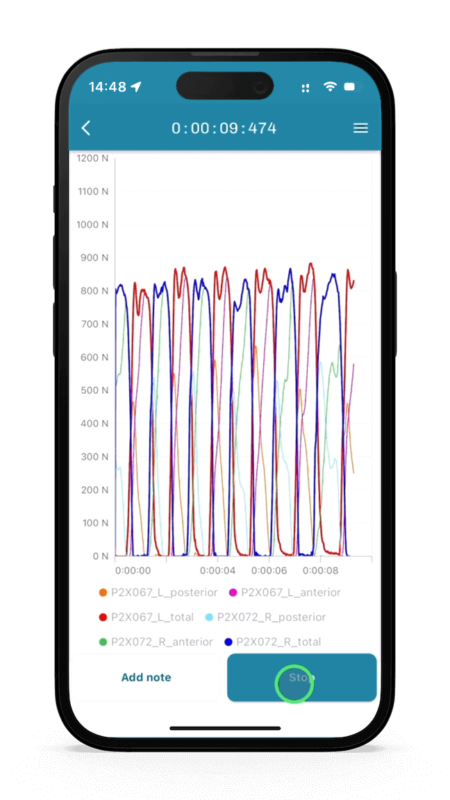
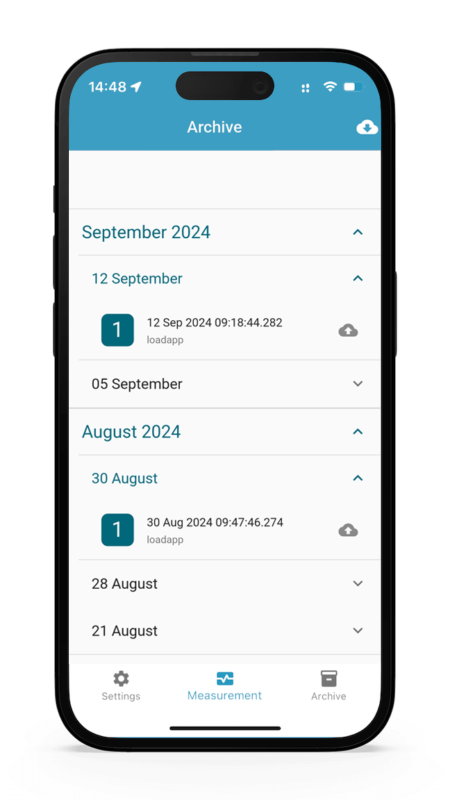
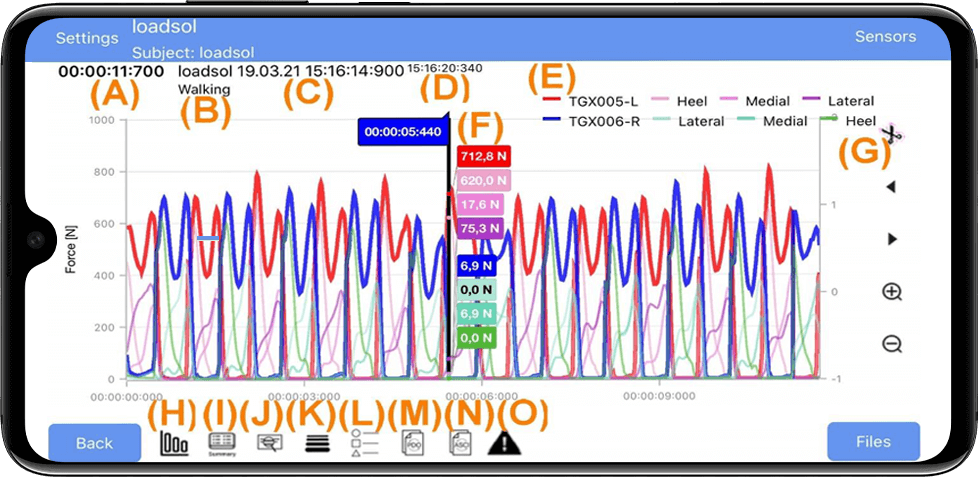
Select one file from the archive, and now you can view the individual data by pressing the graph. You can now see the total curves as well as the sub-areas.
Open the menu at the top right, and enable the legend to toggle the display of individual curves on and off.
Show or hide specific data areas by tapping on their names at the bottom of the curve.
Use two fingers to zoom in on the graph for a detailed view.
Press and hold one finger to display the values not only for what is currently shown but for all regions.
Go back to the overview of the measurement. The data can also be exported and saved as an ASCII file.
In the Analysis section, there are different packages:
For more detailed visual instructions and advanced steps on performing measurements with loadapp please watch the below video:
| green blink (1 time every 1.4 seconds) | ready to connect via BT |
| green blink (1 time every 5 seconds) | system is measuring |
| LED is off |
|
| single white blink | charging |
| solid white | charging completed |
| solid dim yellow | programming firmware in progress or finished |
| double blue blink | BT advertising (i.e waiting for BT connnection) |
| single blue blink | connected via BT |
| double green blink | connected via BT & measuring to OBM |
| double green blink + double blue blink | BT advertising & measuring to OBM |
| sinle green blink | measuring & live streaming over BT |
| red blink | battery low or OBM full or corrupted |
If the internal memory of the insole is full, the insole will blink red when starting the measurement. You need to erase the flash memory:
or
Important Note: The loadsol-s application is no longer supported. Please switch to loadapp and perform your measurements using loadapp.
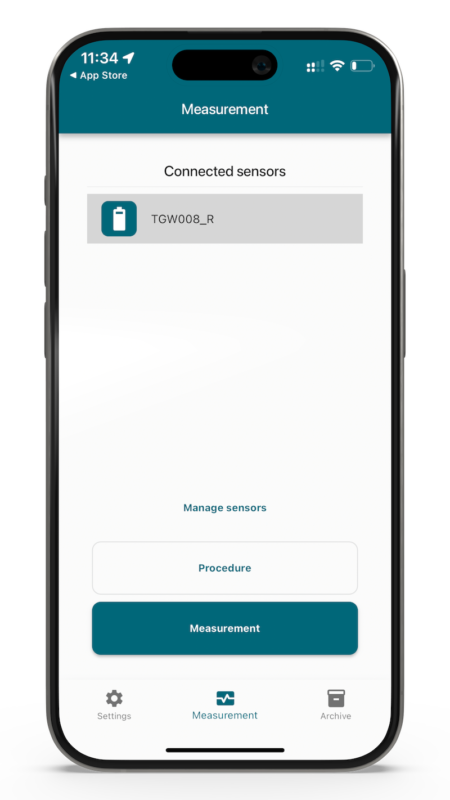
Before you can start the measurement, you need to connect your sensors to the loadapp and loadsol-s application.

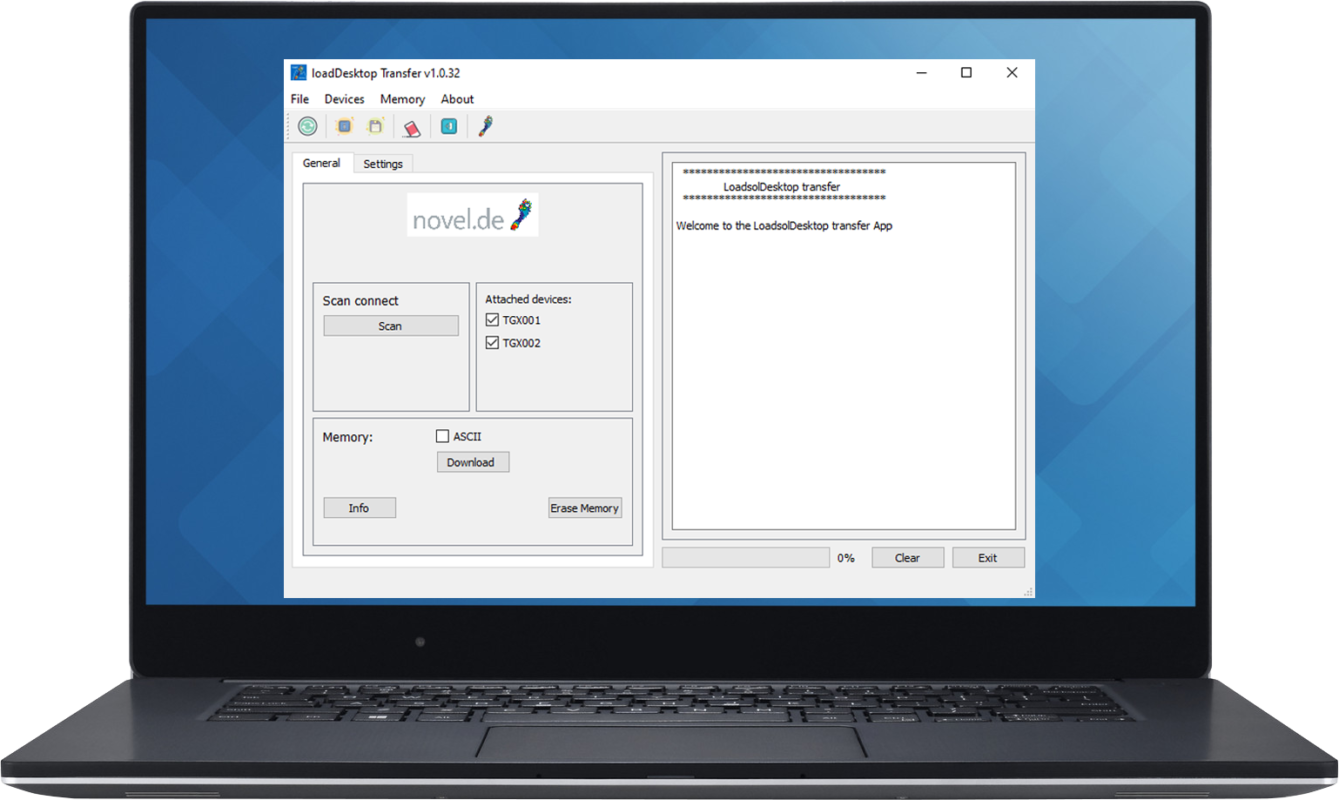
You can download the data from loadsol pro after each measurement via bluetooth or all at once via USB.
This is how:
Access the ascii data from the loadsol-s app from previously collected data:
(NOTE: iOS users must use MAC OS, iTunes, or a 3rd party software to access files on an iOS device.)
Automatically save ascii data and upload to the Cloud within the loadsol-s app:
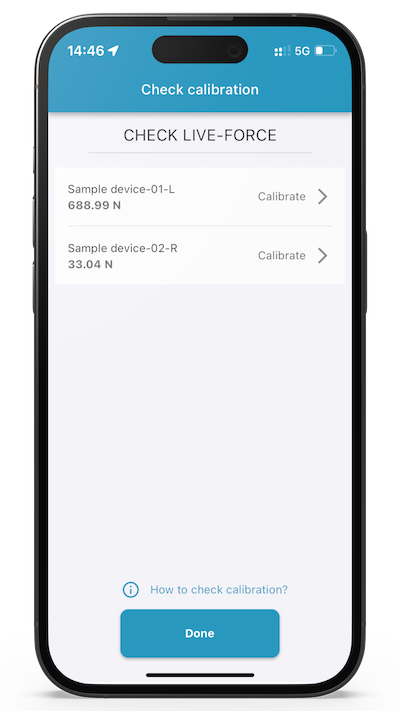
The password is 7007. It is not required to click save, as the calibration is saved for that particular data collection session. As soon as the insoles disconnect it will revert back to the previous saved calibration. Saving is useful if you have the same subject/footwear using the insoles for multiple days.